Modelling the Creation of HTML from JS/jQuery
Dynamic Creation
When we call something dynamic, we mean that it exists only at run time. We can define the structure in our code but it will not physically exist until the page is loaded and the JS/jQuery code is run.
To start with, we are going to consider how we can build a webpage using JS/jQuery.
For the Summer Work, you were asked to create webpages using actual HTML 5 code. In this section, we will do the same BUT we will only use JS/jQuery to make those elements using data from dictionaries.
Remember that, a Dictionary has a:
- single name
- parts that are identified using "keys"
- values that are accessed by using the "key"
In this website, there are several dictionaries that are defined in specific files but we will use the key terms dictionary:
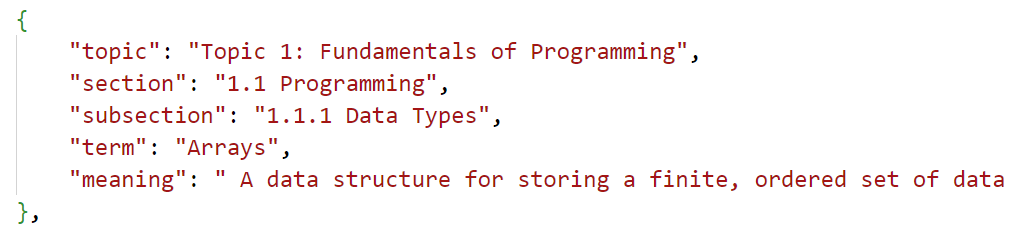
This is a dictionary containing information about key terms and has the following keys:
- topic
- section
- subsection
- term
- term
- meaning
This data can be found in the file called terms.js in the folder
data
What will we create?
We are going to use the dictionary element to make a block of HTML code containing the information from the dictionary.
If we write this information as HTML Code into this page, modelling.html, the code we
produce would look like this:
Topic 1: Fundamentals of Programming
1.1 Programming
1.1.1 Data Types
Arrays
A data structure for storing a finite, ordered set of data of the same data type within a single identifier.
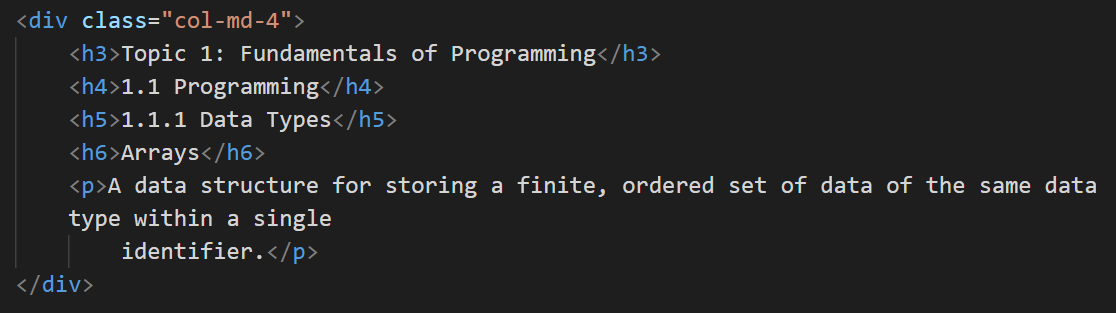
You should see how each element of HTML Code is displayed using the code.
In this section we are going to learn how to make this using JS/jQuery and then place it into the correct place on the page.
Step 1: Setting up the HTML page
The HTML page needs to have a place for the new elements to be placed.
We do this by making an element to contain the new elements and giving it a unique identifier. This is a very common procedure when writing dynamic web pages.
You can find this code on line 356 of this HTML page where a div element has been
given the id of containerForTerms

Step 2: Using JS/jQuery to create elements
You should see that the element with id = "containerForTerms" is completely empty -
there is nothing between the div tags.
We are going to place something there using JS/jQuery.
Step 2a: Controlling the Actions
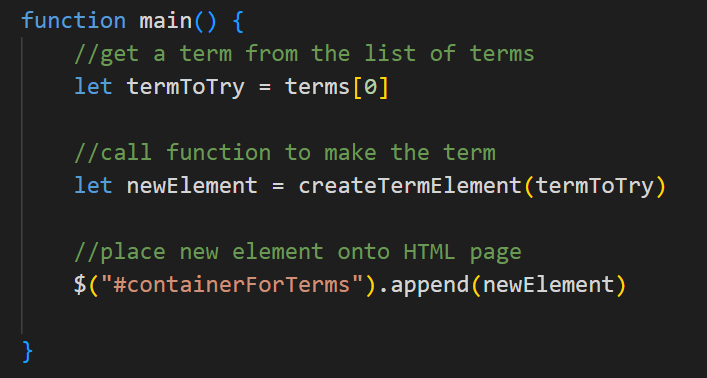
This is done in the JS code and you can see the main() routine here. Remember that the
main() routine is there to control the actions that we want to carry out. It
does the following:
- selects a term from the list of terms and calls it
termToTry - passes
termToTryto the subroutinecreateTermElementand puts the return value into the varaible callednewElement - appends or adds to the end of,
newElementto the HTML element with anidofcontainerForTermsusing the jQuery code$("#containerForTerms"). the#symbol means that the element with the specificidis selected
Step 2b: Creating a Function
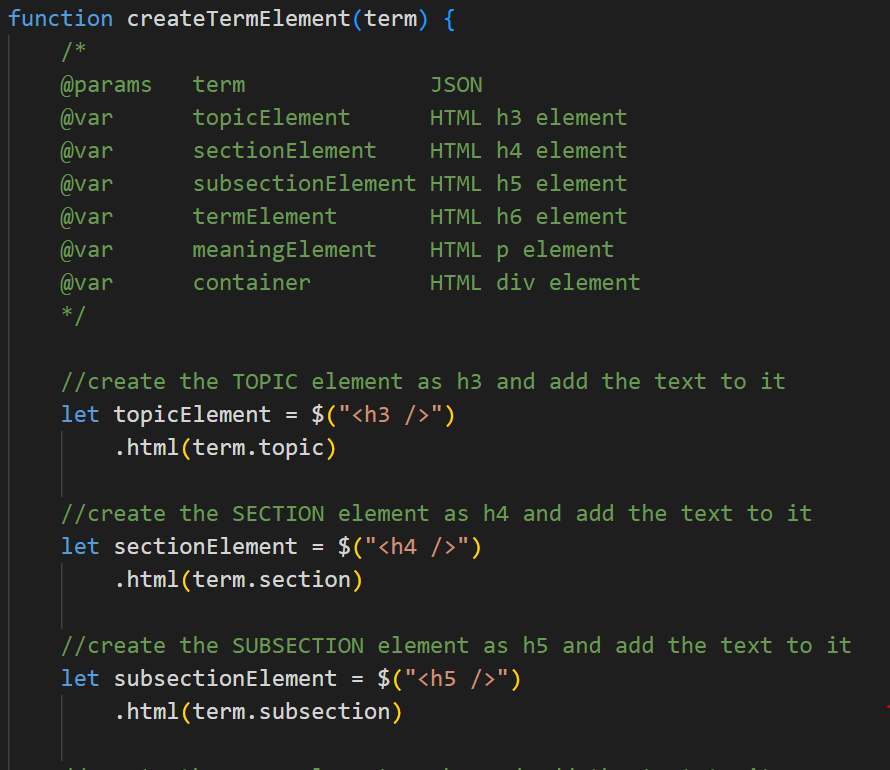
This is done in the JS code and you can see the createTermElement() subroutine here.
Remember that this function is there to carry out our instructions - the actions that we want
to carry out.
It does the following:
- creates an h3 element called
topicElementusing jQuery code to define a heading 3 element. It then adds the topic from the dictionary to this using the method.html(terms.topic)
This puts the topic value between theh3 tags - creates an h4 element called
sectionElementusing jQuery code to define a heading 4 element. It then adds the section from the dictionary to this using the method.html(terms.section)
This puts the section value between theh4 tags - creates an h5 element called
subsectionElementusing jQuery code to define a heading 5 elements. It then adds the topic from the dictionary to this using the method.html(terms.subsection)
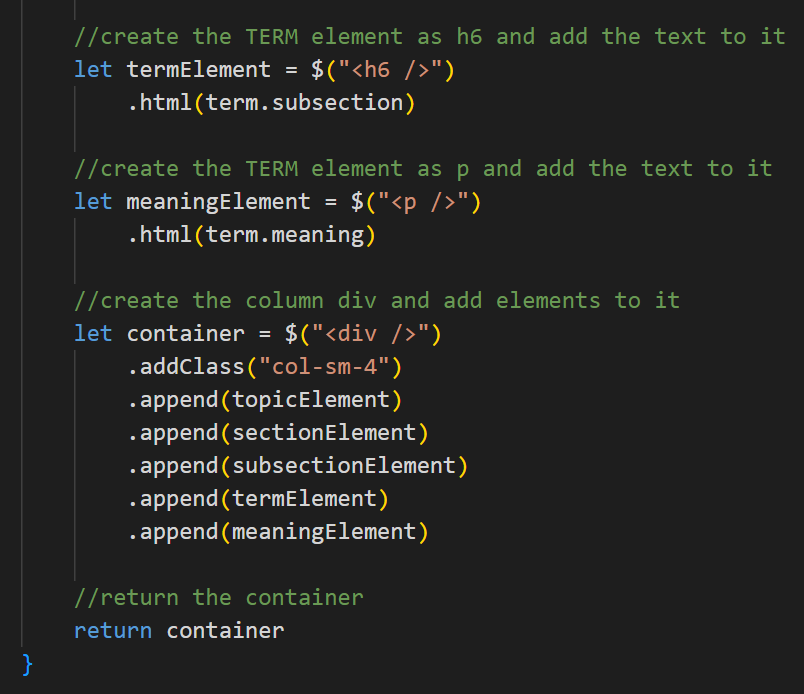
This puts the subsection value between theh5 tags - creates an h6 element called
termElementusing jQuery code to define a heading 6 element. It then adds the term from the dictionary to this using the method.html(terms.term)
This puts the term value between theh6 tags - creates an p element called
meaningElementusing jQuery code to define a paragraph element. It then adds the meaning from the dictionary to this using the method.html(terms.meaning)
This puts the meaning value between thep tags - the last thing to happen is to create a div element called
containerusing jQuery code to define a div element.
It then adds a class to that div so that it shows as 4 wide.
It then appends to it all of the other elements that have been created using.appene(topicElement)etc.
This puts the all of the newly created elements inside this container, which is then returned to themain()routine.
Adding a bit of style!
It would be nice to add a bit of style so that the terms look nicer.
We do this by adding some styles into a Cascading Style Sheet (CSS) file.
A CSS file contains dictionary defintions for styling to apply tp HTML elements that have been tagged by class or by id. You have already been using this by applying Bootstrap styles - we will now add our own styles.
The Style Sheet
the stylesheet can be found in the css folder and is called styles.css. This is really
just a plain text file but contains dictionaries that define styles using key:value pairs.
Style that are to be used in different places in the webpage are defined as classes using a "dot" to prefix the name of the dictionary.
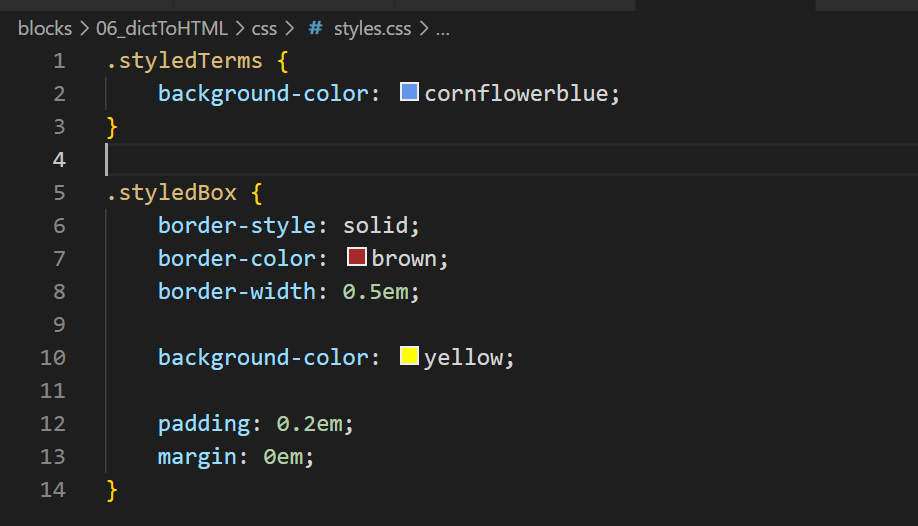
You can see here that there are two style classes defined:
.styledTerms.styledBox
background-color:represents the background colour of the element that this is applied to. Notice that it is an American spelling!border-stylerepresents the style used for the border of the element. In this case it is solid but it cound be dotted or dashed etc.border-colourrepresents the colour used for the border of the element. This can be defined using a hex-value (preceded by a #) or one of the predefined colour names as I have here.border-widthrepresents the width used for the border of the element. This can be defined using different units such as points (pt) or pixels (px). Here, I have chosen a usit called ems - em is relative to the font size of this element i.e. here it is 0.5 of the base font-size for thisany bootstrap elementwhich is 16px but it will scale if the base font-size is changed.paddingrepresents the amount of space inside the border of the element before any text can be placed, again defined in emsmarginrepresents the amount of space outside the border of the element before the next element can be placed, again defined in ems
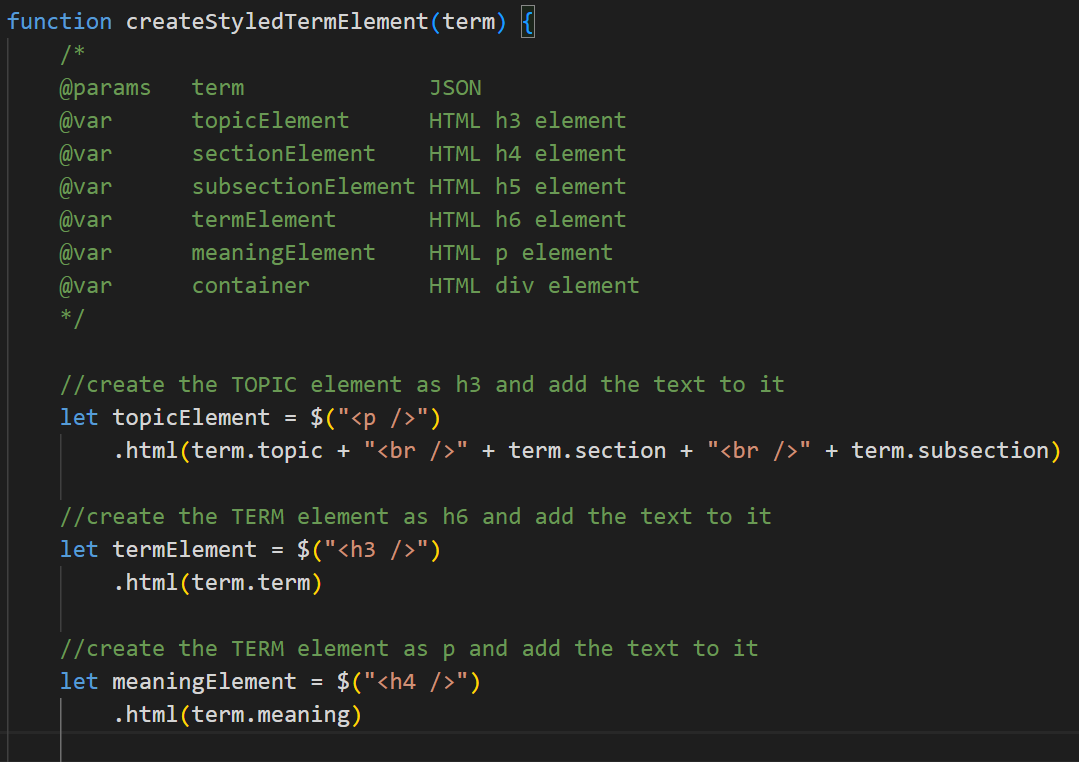
The JS Function
There is only a slight chnage to the previous function but it has been copied and renamed so that you
can see the difference. The function is now called createStyledTermElement.
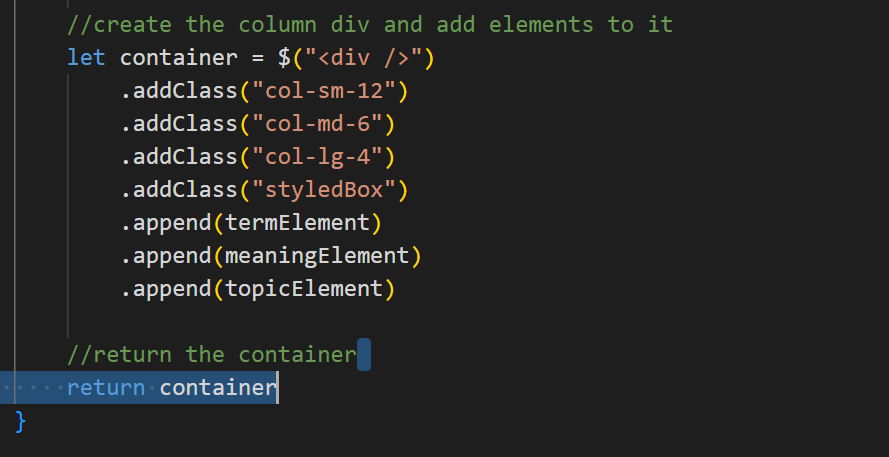
The only changes that you should see are that we add more classes to the element:
.addClass("col-sm-12")
This is the responsivesetting for the width of the column on a small screen so that ONE element fits the entire width of the screen..addClass("col-md-6")
This is the responsivesetting for the width of the column on a medium screen so that TWO elements fit the width of the screen.addClass("col-lg-4")
This is the responsivesetting for the width of the column on a large screen so that THREE elements fit the width of the screen.addClass("styledBox")
This adds the style that we defined in the style sheet to this element
This video goes through the modelling the first part on this page:
This video goes through the modelling the second part on this page: